
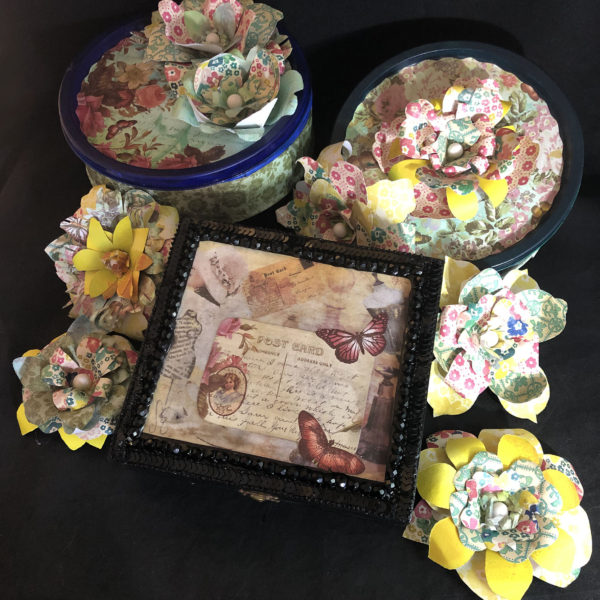
Jewelry and Gift Box
Hello crafty neighbors! Sorry to inform you the show on WWLP Channel 22 is cancelled for tomorrow. I wanted to post this blog so you would still be able to make the crafts in time for Valentines Day. All the templates and clipart is at the bottom of the page for you to download. I scanned my antique ephemera collection, some carved cameos and some antique picture frames. All you need to do is print out the files below. There are TONS of images I’ve put together for you. We will be making some earrings, a necklace and a matching gift box today. Let me know if you need any help. You can text me at: 413-512-3714 or email me at: info@fancythatantiques.com I will be back on Mass Appeal on March 4th for another fun project. Keep in touch on FB and I will see you soon.
Stay warm and sparkly!
~Malena
SUPPLIES
Decorative paper, construction paper or card stock
White glue
Jewelry findings
Hot glue and glue gun OR plastic zip lock bag
Scissors
Iron
Parchment paper
Old gift card or credit card (to smooth out the glue)
JEWELRY INSTRUCTIONS #1 For a shiny finish using hot glue.


quickly melt the surface so it makes the glue transparent.

For a video on this technique, watch the FALL LEAVES segment HERE. I did the same technique for that project.
JEWELRY INSTRUCTIONS #2 For a matte finish using zip lock bags
The first and last few steps are the same.


As most of you know, I have rooms and rooms and roooooooms of junk jewelry and findings. Let me know what you need and I can ship it to you. Most items are not expensive. You can get everything you need for less than $5.
GIFT BOX INSTRUCTIONS
Cut out 2 layers of paper using the box template. Each paper should be a different decorative pattern.
To strengthen the box, you can melt a plastic bag over the surface using the instructions above.
Using a credit card or butter knife, gently score the lines so they are easy to fold.
Fold the box together and glue the tabs with white glue.
Cut the 2rd layer into pieces (dark pink areas on the template). You then glue those pieces to the inside so the box is more sturdy.
Cut the Victorian clip art and glue onto the box. You can use old lace, beads, etc to give it a vintage flair.


