Today on Mass Appeal I am going to show you how to make darling phone cases and faux desserts with caulk. There are so many things you can do with caulk. Most of the items you need can be found at…
du du du duhhhh, THE DOLLAR STORE! The dollar store is the continuous base for all my craft projects. No reason to spend a ton of money. My husband Bruce always says, “Yes I KNOW you can make that, but it will cost $100 at Joann’s Crafts and the ready made item is $30 HONEY!” So, I always try to out cheap him. I’m very competitive and proud of my cheapness. hee hee! Her royal frugalness, Malena Cheapness Chipps has arrived! One good things about me trying everything out FIRST is, I get to make all the mistakes for you. By the time I do my demo on TV, I’ve found all the techniques that don’t work. Caulking is stinky and very messy. You will want to open the doors and windows and wear tight latex or vinyl gloves. Corn starch is very helpful to prevent sticking!
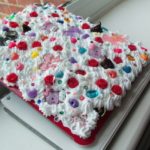
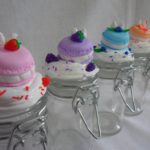
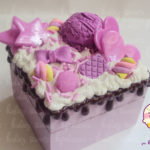
Here are a few crafts I found to be VERY entertaining this week! I am starting with the easiest one and ending with the most time consuming for your convenience. Here are some Decoden crafts I found on the internet. I didn’t make any of these. They are just examples of things you can do.
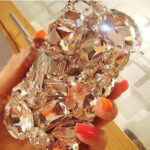
- Rhinestone phone case
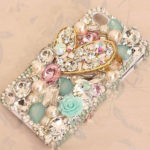
- Rhinestone & flat back cab phone case
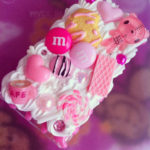
- Silicone caulk decoden phone case
- Silicone caulk decoden phone case
- Silicone caulk decoden phone case
- Silicone caulk decoden iPad case
- Silicone caulk & clay jars
- Silicone caulk decoden clip
- Silicone caulk decoden box
- Silicone caulk decoden jewelry box
- Silicone caulk decoden jewelry box
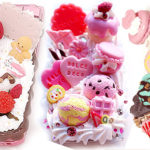
- Silicone caulk & clay faux food
Decoden Rhinestone Phone Case
ITEMS NEEDED
1 Large tube of 100% silicone caulk in CLEAR
1 Caulking gun
1 Long needle, nail or pencil ( for poking the seal)
1 Phone case
1 Set of nail art confetti
2-3 Colors of glitter
Old broken jewelry or thrift/dollar store jewelry, Buttons, Flat back cabochons (Anything you want to use as decor)
1 Nail file or sand paper
Latex or vinyl gloves
Corn starch (helps the caulk not to stick to your hands etc)
Wax paper (to protect your surfaces)
PREP
Put your gloves on and keep the corn starch nearby!
INSTRUCTIONS
- Sand down the phone case or item of your choice. This helps the caulk to stay in place and adhere to the item better. If you are using old jewelry like I did you will want to use wire cutters to cut off the clasps, earring posts and pin backs.
- Cut the tip off the caulking tube so it will fit the decorator tip, then poke the seal. Duct tape the HELL out of the tip! *On my first attempt I did it the hard way, and boy was it sticky and messy. I will show you how to do that method too, but first the easy way!
- Starting at the top, make thick lines across the phone case with the caulking gun. Once you have covered the whole case, go around the entire case framing it with caulk. Next, use an old pen, a stick or your finger to smooth the caulk around the surface of the case. You want a good thick layer!
- Sprinkle glitter color #1 all over the caulk on the case, smoothing it afterwards like icing a cake! Now comes the fun part…
- Carefully push the broken jewelry into the glittered silicone calk. The caulk should surround the edges and if it doesn’t you need more caulk. You don’t need to be perfect or have a pattern for this to look awesome. You can do as little or as much designing as you want.
- Once all the decorations are secure on the case, sprinkle nail art confetti over the entire case. Press gently with your hand which should be covered in cornstarch to prevent sticking. Then take your optional second glitter color and sprinkle generously over the case.
- Let dry for 6-12 hours. Take the case and shake it upside down over a sandwich bag or other container. This will shake loose the extra glitter. To be clean, I ran cold water over the case and gently wiped it down. If there are any long silicone cobwebs anywhere you can cut them off with scissors.
LINKS
All Acrylic Flat Back Cabochons
EVERYTHING you’ll need from Oriental Trading Co (Fun quality)
More Jewelry Supplies (better quality)
Flat back Metal “Jewelry” (High quality)
(OBVIOUSLY I have tons of old jewelry like single rhinestone earrings at the shop. I’m happy to put a bag together for you for $5-up depending on how much you want. I’ll even cut off the backs for you! Just ask!)
Strawberry Shortcake Organizer
(Perfect for teen girls)
ITEMS NEEDED
1 Large tube of 100% silicone caulk in WHITE
1 Caulking gun
1 Long needle, nail or pencil ( for poking the seal)
1 Plastic organizer or paper box
1-2 Colors of ACRYLIC paint
1 Set of nail art confetti
Plastic or resin flat back cabochon decorations
(OR other dollar store decorations)
1 Nail file or sand paper
1-3 Cake decorator tips
Strong heavy duty duct tape
OPTIONAL
Cake decorator bags
Corn starch
PREP
Put your gloves on and keep the corn starch nearby!
INSTRUCTIONS
- Sand down the organizer or item of your choice. This helps the caulk to stay in place and adhere to the item better.
- Cut the tip off the caulking tube so it will fit the decorator tip, then poke the seal. Duct tape the HELL out of the tip! *If you want to add color to the white caulk, put a drop of acrylic paint in a plastic mixing bowl, squeeze the calk in and fold in the paint with a small stick. Then scrap the caulk into a cake decorator bag. This is VERY MESSY!! Make sure to have gloves, baby wipes, paper towels and a rag handy!
- Starting at the top, make thick lines across the organizer with the caulking gun or cake decorator bag. You will want to start on one side and go down to keep a pattern going. Once you have covered the whole case, go around the entire case framing it with caulk. You want a good thick layer!
- Sprinkle nail art confetti color #1 all over the caulk on the case. DO NOT TOUCH YET!
- Carefully push the flat back cabochons into the silicone calk. The caulk should surround the edges so push them in until they hit the bottom. You don’t need to be perfect or have a pattern for this to look awesome. You can do as little or as much designing as you want.
- Once all the decorations are secure on the case, sprinkle one more layer of nail art confetti over the entire case. DO NOT TOUCH YET!
- Let dry for 6-12 hours. Take the organizer and shake it upside down over a sandwich bag or other container. This will shake loose the extra confetti. To be clean, I ran cold water over the case and gently wiped it down. If there are any long silicone cobwebs anywhere you can cut them off with scissors.
OPTIONAL STEP
If you want to make chocolate or strawberry drizzle, you can add a few drops of acrylic paint to Elmer’s glue. Mix really well, then draw drizzles vertically starting at the top and let it drip down. Let that dry for 12 hours and spray with clear matter or glossy varnish to set.
SILICONE CAULK CLAY
You can easily make your own clay with caulk and corn starch. You’ve seen those darling flat back cabs on the links I gave you. If you don’t want to buy them you can make them yourself. Start by pouring a cup of corn starch into a pan. Then squeeze out the 100% silicone caulk into the corn starch. Cover the caulk with the corn starch and continue to kneed it in until it feels like play-dough. Add a few drops of acrylic paint for color if you wish and kneed in until you get the color you want. Now you can sculpt anything you want out of the clay and let it dry for 12 hours. After the item is completely dry you can paint it with acrylics.
**The item will be squishy! Kids love squishy things. Doll shoes and boots are a big favorite with silicone clay as are little G.I Joe outfits and accessories. You can make clothes for polly pockets too because the silicone is stretchy and gives.
SILICONE MOLDS
Squeeze silicone into a mixing bowl and add 1/2 as much corn starch to the silicone. Put in a few drops of acrylic paint and a drop of olive oil, baby oil or Vaseline. Mix well, then form a ball in your hand and push it down into a slight cookie shape. Take the cameo or other item you want molded and push it down into the clay. Make sure you have enough clay on the bottom so it surrounds the object. Let it dry inside the clay for 20 minutes to an hour depending on the size of the object. Remove the object.
Here is a video for you on how to do it:
https://www.youtube.com/watch?v=50AkrE1s9Iw
FLAT BACK CABOCHONS
-Here are two ways to make your own!
Now you have your mold, you can use your glue gun to squeeze hot glue into the mold. Swirl the glue around the edges of the inside of the mold to get all the details. Let it dry and wa-laa! You have a replica of your cameo or other object.
You can melt crayons by microwaving them in an old container and pouring the hot wax into the mold. (Microwave only for a few seconds at a time and watch it! As soon as the crayon melts, take it out of the microwave!) Put the mold on a Tupperware lid for safety and carefully pour the hot wax into the mold. Then put the mold in the freezer for an hour or so. Since the crayon is already colored, you won’t have to paint the cabochon! You can get really creative with crayon colors by mixing and marbling them. The smaller you cut them up the more blended the colors will be.
I look forward to showing you all this tomorrow on Mass Appeal. If you have any craft ideas you would like us to do on the show, let us know by emailing me. Constructive criticism is also welcome! Thank you so much for watching. See you all tomorrow.
Happy Crafting!
Malena Chipps
413-512-3714 Store
Hours:
M-Saturday 10:30-4:30pm
Sunday 1-4pm
