
Greetings neighbors. Here are a few easy jewelry DIY projects you can make to accessorize your Halloween costume and your home. The lace chokers, stacked earrings and cuff bracelets are my designs. The printable clip art and shopping links are at the bottom of the page. The crystal ball and the blood choker necklace are ideas I found on YouTube. The videos are linked under the instructions. If you don’t have the money or health to go out and buy the jewelry supplies, just text or email me and I will send you a FREE box filled with everything you need to make the jewelry (Ma residents only. Viewers outside of MA will pay $15 including shipping to cover the costs). I usually buy enough supplies for 10 gift boxes. I hope you enjoy the show! Text me at the studio at: 413-512-3714 or email me at: info@fancythatantiques.com Let me know how you are doing. I always love hearing from you. Stay safe and have a spook-tacular Halloween!
Love,
Malena

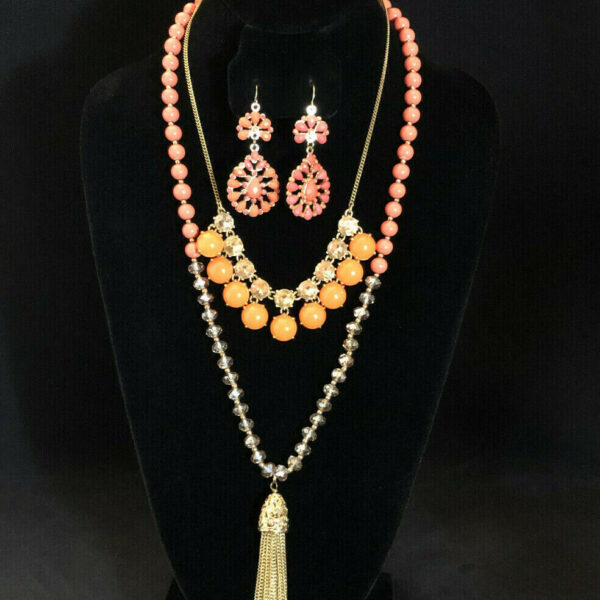
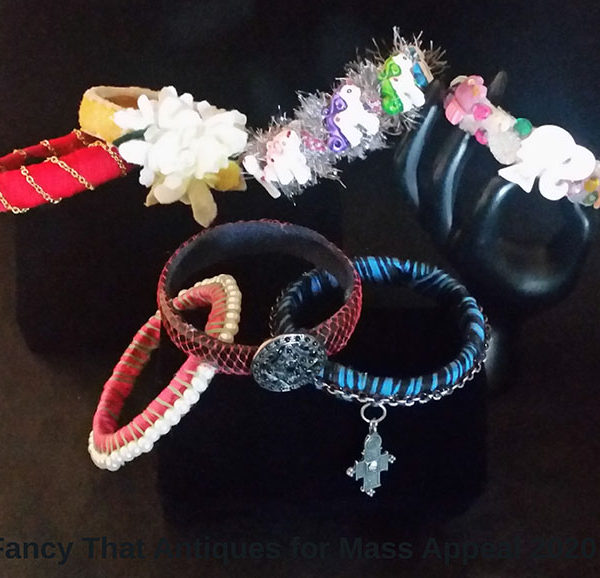
Project 1 Lace Choker and Earrings
SUPPLIES
Cardboard or card stock
Black construction paper
Scrap fabric, felt or foam sheets
Plastic bugs and bats
Lace (Buy the color of your choice of dye the lace with RIT fabric dye)
Ribbon
Jewelry findings
Hot glue and glue gun
Optional: metallic eye shadow, glitter or rhinestones, etc for decoration.


FULL INSTRUCTIONS FOR JEWELRY
Lace Choker and Earrings
Print out the templates
Measure neck and wrist. For a choker the average is 14” if you add ribbon on the ends.
For a bracelet, you will need 7” plus ribbon due to width.
Cut scrap fabric, felt or foam sheet. I would suggest 1.5-2” wide.
Cut lace 2” longer than the fabric/foam.
Cut clip art for centerpiece.
Glue black paper to card-stock (cereal box, etc.)
Glue clip art to black paper
Paint over entire surface with glue.
Allow to dry and trim edges.
*FOR EARRINGS*
Push a pin through the layers of paper and add a hook.
Glue lace to foam/fabric.
Glue ribbon on the back side ends.
Glue clip art to the center.
Glue spiders/bats to decorate.
Dry brush metallic paint or eye shadow to the surface for an aged effect.
Below you will find the templates and the printable clip-art you will need.
Project 2 Crystal Ball

SUPPLIES
Food coloring
Baby oil or cooking oil
Water
Alcohol
Dollar tree snow globe
Dollar tree plastic crystal bowl
Acrylic paint
Glitter
Hot glue and glue gun
Optional: glow in the dark powder, lace, beads, etc.
INSTRUCTIONS
Paint the inside of the plastic bowl with black paint
Dry brush paint the outside with metallic paint.
Fill the globe ½ full with alcohol and water
Add food coloring
Add glitter, metallic powder and/or glow powder
Add baby oil
(to color the oil, use gel food coloring)
Glue the inner seal with hot glue
Paint the lid black and allow to dry
Hot glue the lid to the upside down plastic bowl
Add hot glue to the inside of the lid and screw down the ball.
Decorate the rim of the lid with lace, glitter, rhinestones, etc.
Project 3 Blood Choker Necklace

SUPPLIES
Hot glue
Metal or glass bowl
Red fingernail polish
Red ribbon or satin cord
INSTRUCTIONS
Draw a line of hot glue on a glass/metal bowl
Draw vertical lines of hot glue
REPEAT until it looks like dripping blood
Allow to dry, peel off.
Use a lighter and heat a pin to push through the ends.
Paint with red nail polish, spray paint or acrylic paint.
Thread red cord/ribbon through the holes on the ends and knot.
FREE CLIP-ART DOWNLOADS
LINKS
Here you will find all the best projects for Halloween!