This Tuesday on Mass Appeal we are going to show you how to make lovely glass ornaments with the paint on the INSIDE. I’ve always loved the Christopher Radko glass ornaments but wouldn’t spend the money to decorate the entire tree with them. I found a way to make really pretty ornaments with old nail polish, nail polish remover and glitter. It’s so easy and you can make all kinds of color combinations with very little paint!
-
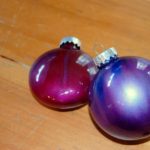
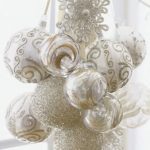
- DIY Nail Polish Ornaments
-
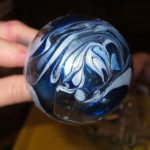
- Swirl the colors around inside
-
- You can also use melted crayons!
-
- Shaken not stirred! Add acetone remover.
-
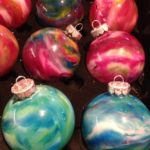
- These have one color and glitter
-
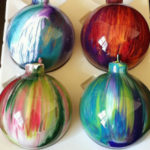
- A few colored shaken together
-
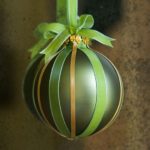
- Add ribbon!
-
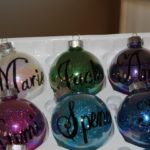
- Use a sharpie and write your families names!
-
- Add designs with a glue gun then paint with polish!
-

- Add designs with glitter glue!
-
- Paint with glitter glue, then glue on tiny beads!
-
- Paint with elmer’s glue and add glitter!
SUPPLIES NEEDED
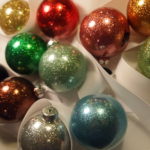
Clear glass ornaments $-6-8.50 for 12 (plastic doesn’t work as well because it deteriorates)
Nail polish $1-5
Paper towels
Paper cup or throw away cup
Glitter, Glitter glue, Hot glue, Rhinestones *Optional
This is soooo easy you will laugh that I am teaching you how to do it!
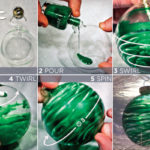
STEP ONE
Thin out the nail polish with acetone remover so it pours easily. A few drop should do.
STEP TWO
Take the top off the ornament and hold it in your hand so it is slanted to one side. Drop the nail polish in and swirl it around. Depending on the effect you want, you can let each layer dry OR let the colors run together. You can control the color with a Q Tip or a small paint brush if you like. Add glitter and a few drops of remover and swirl the glitter around.
STEP THREE
Pour the extra nail polish out and allow the ornament to dry upside down in a paper cup or egg container. You may want to turn it over every hour if you have a lot of colors.
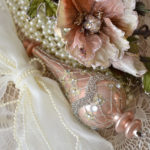
You can take this craft one step further if you like by adding decorations on the outside with a glue gun, white glue, or glitter glue. Add dots, lines, etc with your glue. Add some rhinestones or flatback pearls and lace for a professional look! You can find MANY ideas on my DIY Christmas Decor pinterest page. Here is the link!
Happy Crafting,
Malena