• We Buy Jewelry!
    • Shop
    • About Us
    • Blog
    • Contact

    Fancy That Antiques Buying and selling for a better community!

    DIY Fall Decor with Recycled Aluminum Cans

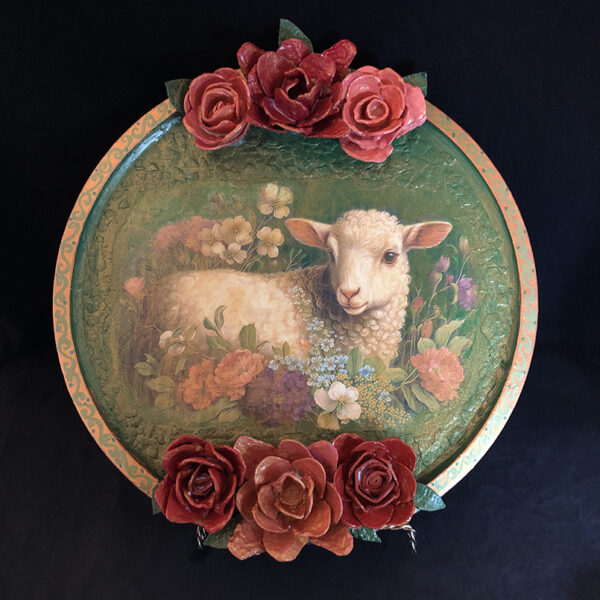
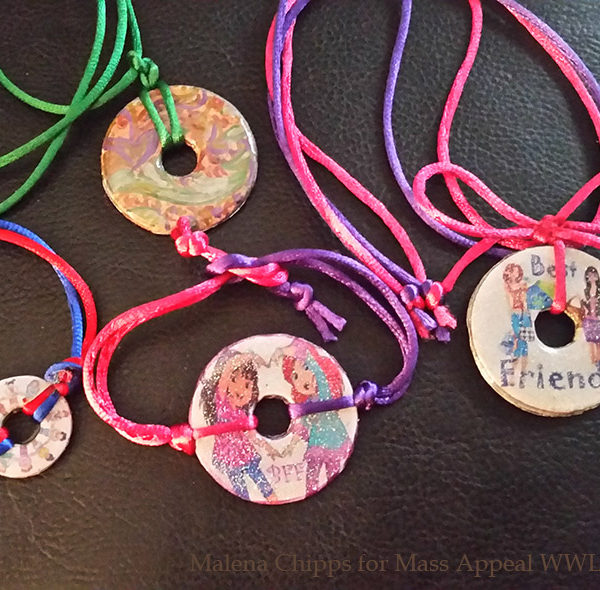
    Greetings neighbors! Happy fall! This is my favorite time of the year. I love the leaves changing and the cool weather. In my opinion, our state is the most beautiful place to live in the whole world! There’s no place I’d rather be. I wanted to capture the beauty of the our fall season in a craft you would be proud to display in your home. So, this is what I came up with. I hope you like these ideas. You can make jewelry, gift box toppers, book covers, picture frames, mirrors, lamp shades, candle holders, wreaths, outdoor garden flowers, mini lanterns and much more with this technique. All the supplies are from the Dollar store (except my alcohol inks and metallic paints) to keep the cost down. All the patterns are at the bottom of the page. Feel free to text or email me if you need any help at:

    413-512-3714 or info@fancythatantiques.com

    Supplies

    Aluminum cans OR disposable aluminum cookie sheet (for larger projects)

    Scissors

    Pen

    Tape

    E6000 glue

    Hot glue gun & glue

    Paint brush

    Alcohol

    Paints: Alcohol ink or permanent markers, metallic acrylic paint or spray paint (details below)

    Mod Podge, varnish or clear spray sealer

    Additional optional items:

    For wreath: Cardboard box or wire wreath frame, 2 metallic wide ribbon, 1 mesh wide ribbon

    For candle holders: Glass or LED candles

    For medusa mirror: Round mirror

    Directions for each project below. All the items are made with the same embossing technique.

    HALLOWEEN HAUNTED HOUSE (Kids project)

    Print your pattern and place over the cookie sheet.
    Tape the pattern on the aluminum sheet. Cover the entire pattern with clear tape.
    With a pen, embossing tool or the end of a paint brush, trace the pattern. Go over the lines a few times so the design is really pushed in well.
    Turn the sheet over and start outlining the lines on this side. Go around each line on the inside and outside.
    The more you outline, the more detail you will get.
    Remove the taped pattern. Cut around the edge cookie sheet. Then continue to emboss on this side.
    I used alcohol inks and a small paint brush for this project.
    Paint the back and cut out the house.
    Use aluminum foil tape to secure the house around a small wide candle. This is a cute Halloween craft for the kids.

    WREATH

    Trim straight and round the edges. You can wear gloves if you want my protection.
    Cut out your patterns
    Tape the pattern to your can.
    OR Tape the pattern to your cookie sheet.
    Take a pen and trace the lines in firmly.
    Take the pattern off and turn the item over. Trace around the outside and inside of the lines.
    Repeat on both sides adding more details as you emboss.
    Emboss and keep adding more details.
    Same on the cookie sheet.
    More details on both sides.
    Now you can paint them. Painting ideas at the bottom of the page.
    Red, green, yellow and brown alcohol inks dropped on and allowed to dry.
    Cut the leaves out. Painting the back side is optional. Seal the front with Mod Podge or clear coat spray varnish.
    QUICK OPTION: You can use permanent markers instead of alcohol inks, it will just be lighter in color.
    Put a few drop of alcohol on the marker lines and allow it to blend together.
    Allow to dry completely. Add a layer of acrylic paint or use as is.
    Cut fabric or metallic wide ribbon into squares.
    Wrap a wreath frame or cardboard circle with mesh ribbon. Glue the back.
    Hot glue the squares on the mesh, squishing them in as you go.
    I used 3 rolls of different colors and patterns.
    Once the leaves are completely dry, glue them on the wreath starting in the center bottom.
    The largest leaves go in the center on the top and bottom.

    CANDLE HOLDERS

    Cut the edges off the sheet. Wrap the sheet around your candle to measure the height and width.
    Tape the pattern to the sheet.
    Use a pen to emboss the leaves. Start by tracing the outside lines and work inward.
    Continue to emboss all the leaves on this side.
    Turn the sheet over and use the pen to emboss around the lines you created.
    This is what it will look like.
    Continue embossing lines on both sides in the recessed areas.
    Use a craft knife and cut slits in the leaves so the candle light will show through.
    Close up view.
    Drop 3 colors of alcohol inks on the sheet and allow to dry completely. Trim to size.
    Outline the leaves with a gold metallic paint pen. Seal with Mod Podge. Hot glue or use aluminum foil tape on the inside seam.
    Finished product with glass inserts.

    MEDUSA MIRROR

    Tape pattern to cookie sheet, covering it all with tape.
    Emboss both sides as explained above. Cut out the design. Using a craft knife, cut out the sides of her eyes.
    Drop on metallic acrylic paint. Spread around and all it to dry completely.
    Add the next layer of paints.
    Use a small brush to blend.
    Allow the layer of paint to dry for a few hours.
    For an aged look, use brown and gray paint and dry brush it into the recessed areas.
    Coat the mirror with metallic acrylic paint and allow to dry completely.
    For an antique look, paint a second layer with earth tones.
    Allow both items to dry over night. Cover both items with clear varnish. I added metallic powder in the varnish for a metallic look.
    Glue the Medusa head to the mirror with permanent glue and attach the frame.
    You can see yourself in her eyes. The metal looks old and worn.

    Painting can be done in many different ways.

    1. Spray paint
    2. Color in with permanent markers and blend with alcohol.
    3. Alcohol ink
    4. Acrylic metallic paint (sand the surface first and prep with mod podge.)

    The candle holders are the easiest and quickest to make. The wreath takes about 3 hours in total. The medusa mirror takes the most time due to all the layers of paint. It’s easy, it just takes time to get the aged metal effect.

    Here are some patterns and art files so you can make a bunch of cute stuff! Right click on the image and open in a new frame so you can save it at full size.

    EXTRA PROJECT FOR THANKSGIVING

    3 TIER TRAY

    using 4 glass candle holders, pizza pan, pie pan and cake pan. All items are from the Dollar Tree.

    Put the candle holder in the center and trace with a pen.
    Glue the center with E6000.
    Glue all the areas shown and allow to cure for 24 hours.
    Spray paint with a primer or a metal paint.
    Brush with black enamel.
    Dry brush with metallic paint and allow to dry.

    Here is a photo from the studio today so you can see the tier tray finished.

    Here is a FALL DIY playlist I compiled for you. It’s filled with all my favorite videos for this season. I also made you a Halloween one below.

    50 Fall DIY Videos

    116 Halloween DIY Videos

    I will see you again in December for more craft tips! Start saving your used dryer sheets now. We will be using them for the December show.

    Love,

    Mrs. Chipps

    0
    Previous DIY Nautical Decor with Faux Wood, Ceramic and Porcelain Recipes
    Next Creating FREE artwork with AI Generator Programs

    Related Posts

    Autumn Color Combinations

    DIY Personalized Candles

    Cleaning and Repairing Costume Jewelry

    Copyright © 2026 Fancy That Antiques
    • Facebook
    • Instagram
    • Pinterest
    • Twitter
    Theme by SheShoppes