For Valentine’s Day, I wanted to share with you some fantastic crafts made with toilet paper and glue. These are so simple and turn out really cute. I added Victorian ephemera and graphics I made to give the items an antique flair. As always, I’ve made a ton of digital files for you to download and print out at home. This will include all of the papers and decorations you see me using on the show today. The preview gallery is at the bottom of the page. Included in the google drive link are; Antique Victorian ephemera images, junk journal pages, complete journal kits, a set of 4×6″ Kid’s Valentine cards with envelopes, background pictures, and beautiful embroidered art. If you need help with anything, just text the shop at 413-512-3714. We’d be happy to help you. *These are for personal use only. I don’t put ads on the blog because I find ads insulting, I assume you do too! I sell the images I make on etsy instead. Here is the google drive link.
*The recipes and techniques come from a few different artists on Youtube so I am including their DIY videos.
Project #1
Cast Embellishments
SUPPLIES
White Glue or Modge Podge
Toilet Paper
Silicone Mold
INSTRUCTIONS
*The video shows the process best. The below instructions are the steps I took to make my objects. When in doubt, use the video instructions instead of mine. This technique only works in silicone molds. The plastic soap molds don’t work well because the toilet paper glue mix gets stuck and ruins the mold.
Step 1
Coat the silicone mold lightly with oil or lotion.
Step 2
Tear, don’t cut, pieces of toilet paper into a pile.
Step 3
Place pieces of TP into the mold. Dip a stiff paint brush (makeup brushes work great) into the watered down glue mixture. I used 2 parts glue to one part water. Push the toilet paper into the mold until it dissolves. Keep layering the toilet paper with a little bit of glue into the mold until it is filled. It’s going to have the consistency of mashed potatoes.
Step 4
Allow the mixture to dry overnight or until the mixture is completely white. If it has little dots of cream color that means it is still wet. You want to make sure it’s dry or it will not come out of the mold.
Step 5
Cut around the edges and sand to make a more finished look.
Step 6
Paint and seal.
I painted my embellishments with a gold spray paint first, then I dry brushed them with a dark color acrylic paint in the recessed areas. To get a metallic finish, I used ground up powdered metallic eyeshadow mixed with a tiny bit of Modge Podge/white glue. I allowed the item to dry for a few hours and then I sealed it with gloss finish Modge Podge.
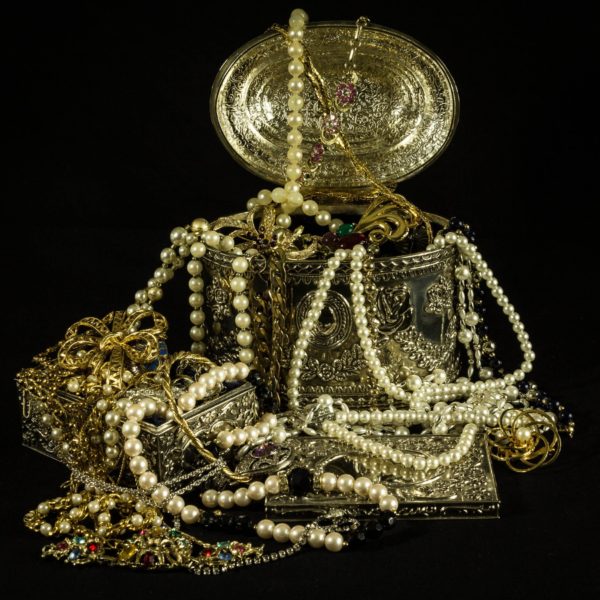
Here are some of the items I decorated with the cast embellishments. I decoupaged tea tins, a cardboard box which I made into a jewelry box and a wood bird house. I also made 2 Victorian style Valentine’s Day cards. The directions for the handmade paper in the center is below.


Embossed Handmade Paper
Victorian Style Valentine’s Day Card
This is made with embossed toilet paper colored with ink and metallic powder eyeshadow in alcohol spray bottle. I added the following to make the card complete;
cardboard from packaging, old pillow case trim, scraps of lace, cast toilet paper and glue decorations and printed Victorian clip art. (Google Drive link at the top of the page. Gallery of images at the bottom of the page.
DIY Silicone Molds
If my written directions are different from those in the video, follow the video. 🙂
SUPPLIES
Corn starch & 100% Silicone Caulk
Step 1
Poor some starch in a bowl. Make sure you have enough that it covers the bottom of the bowl completely.
Step 2
Squeeze some silicone into the bowl and shake it around so the starch completely covers the silicone.
Cover your hands in starch so they are completely dusted so the silicone does not stick to your hands.
Step 3
Mix in a pea size amount of acrylic paint if you like. Knead the mixture into a ball and quickly spread it out onto a piece of parchment paper.
Step 4
Lightly brush the item you want to mold with some cooking oil or lotion so that it will easily pop out of the mold. Press the item you want to mold into the silicone so it makes a good impression making sure completely covers the edges. Make sure the item does not hit the bottom of the parchment paper.
Step 5
Allow the silicone to dry completely. I would say give it about three hours at least. Then bend the silicone back so you remove the the item from the mold.
Step 6
Wash off the item. Then you can paint the new piece with acrylic or spray paint.
Here are 2 good recipes to make your own clay. This clay works best for small projects or with silicone molds. It is not made for big sculptures and fine pieces of art.
No-Cook Toilet Paper Air-Dry Clay (Dries Hard & Kid-Friendly!)
This version includes toilet paper pulp for extra strength and texture while still being easy to make and air-dry.
Ingredients:
• 1 roll of toilet paper (cheap, plain white, no patterns or lotions)
• 1 cup white glue (Elmer’s PVA glue)
• 1 cup cornstarch (or baby powder for smoother texture)
• 1 tablespoon vinegar (helps prevent mold & cracking)
• 1 tablespoon baby oil or lotion (keeps clay soft)
• 1-2 tablespoons water (adjust as needed)
Instructions:
1. Make Toilet Paper Pulp:
• Rip toilet paper into small pieces and soak in a bowl of warm water.
• Let it sit for 5 minutes, then squeeze out excess water until damp but not dripping.
2. Mix the Dough:
• In a large bowl, combine the toilet paper pulp, white glue, cornstarch, vinegar, and baby oil.
• Stir well, then knead for 5 minutes until smooth.
3. Adjust Consistency:
• If too dry, add a few drops of water.
• If too sticky, add a little cornstarch.
4. Use or Store:
• Use immediately or wrap tightly in plastic wrap and store in an airtight container for up to a week.
Why This Clay is Great for Kids:
✔ Dries Hard & Durable – Great for projects like ornaments, figurines, and sculptures!
✔ No Cooking Needed – Just mix & knead!
✔ Soft & Easy to Shape – The toilet paper pulp gives a lightweight, slightly spongy texture that smooths out well.
✔ Takes Paint Well – Once dry, use acrylics, tempera, or markers.
Drying Time:
• Small items dry in 24 hours
• Large items dry in 2-3 days
• Let air-dry naturally (avoid oven drying to prevent cracks)
EASY No-Cook Air-Dry Clay Recipe (Strong & Smooth Finish)
Ingredients:
• 1 cup cornstarch (or baby powder for a smoother finish)
• 2 cups baking soda
• 1 cup white glue (PVA glue, like Elmer’s)
• 1 tablespoon vinegar (helps prevent cracking)
• 1 tablespoon lotion or baby oil (for softness & flexibility)
• 1-2 tablespoons water (adjust as needed)
Instructions:
1. In a bowl, mix cornstarch and baking soda.
2. Add glue, vinegar, and lotion, stirring with a spoon or hands.
3. Slowly add water, 1 tablespoon at a time, until the mixture is dough-like but not sticky.
4. Knead for 5 minutes until smooth. If too dry, add a few drops of water. If too sticky, add a little cornstarch.
5. Store in an airtight container or wrap in plastic wrap until ready to use.
Why This Works for Kids:
✔ Dries hard (no cracks, smooth finish)
✔ No cooking (safe for kids)
✔ Soft & easy to mold
✔ Non-toxic (safe ingredients)
✔ Takes paint well when dry
Drying Time:
• Small items dry overnight
• Larger pieces dry in 1-3 days
• Air-drying works best (avoid oven-drying to prevent cracking)
GALLERY OF FREE IMAGES
The Victorian clip art images are actual antique ephemera that are scanned and optimized. I made the other images just for you! (Jewelry sales by day, computer nerd by night. lol) I hope you like them. Right click on the image you want and open it in a new window, then save it. You can also go to the google drive to download all the images at once. Please do not sell these, they are my gift to you. For personal use only. Thank you!


Here’s a HUGE playlist of DIY Valentine’s Day Craft Videos I compiled for you. I have a TON of craft videos on my Youtube channel if you’d like to subscribe.
I hope you all have a wonderful Valentine’s Day. Feel free to text the shop phone at 413-512-3714 if you need anything. You know I have a bunch of jewelry and craft supplies here. Big hugs from the Berkshires!
Malena (pictured here with my superhero Bruce)